Time to read: 8 min read
The Untold Story of My Home Server - A Journey Through Self-Hosted Services
# Why a Home Server?
Before diving into the services, let’s talk about why I set up a home server. Cloud services like Netflix, Google Drive, or Evernote are convenient, but they come with recurring costs, privacy concerns, and dependency on someone else’s infrastructure. A home server lets me host my own media, back up my photos, manage my network, and even run custom apps—all on my terms. My setup runs on a (mini pc bought from Amazon) Ubuntu machine with Docker, making it easy to manage and scale. Here’s a look at the services that make it tick.
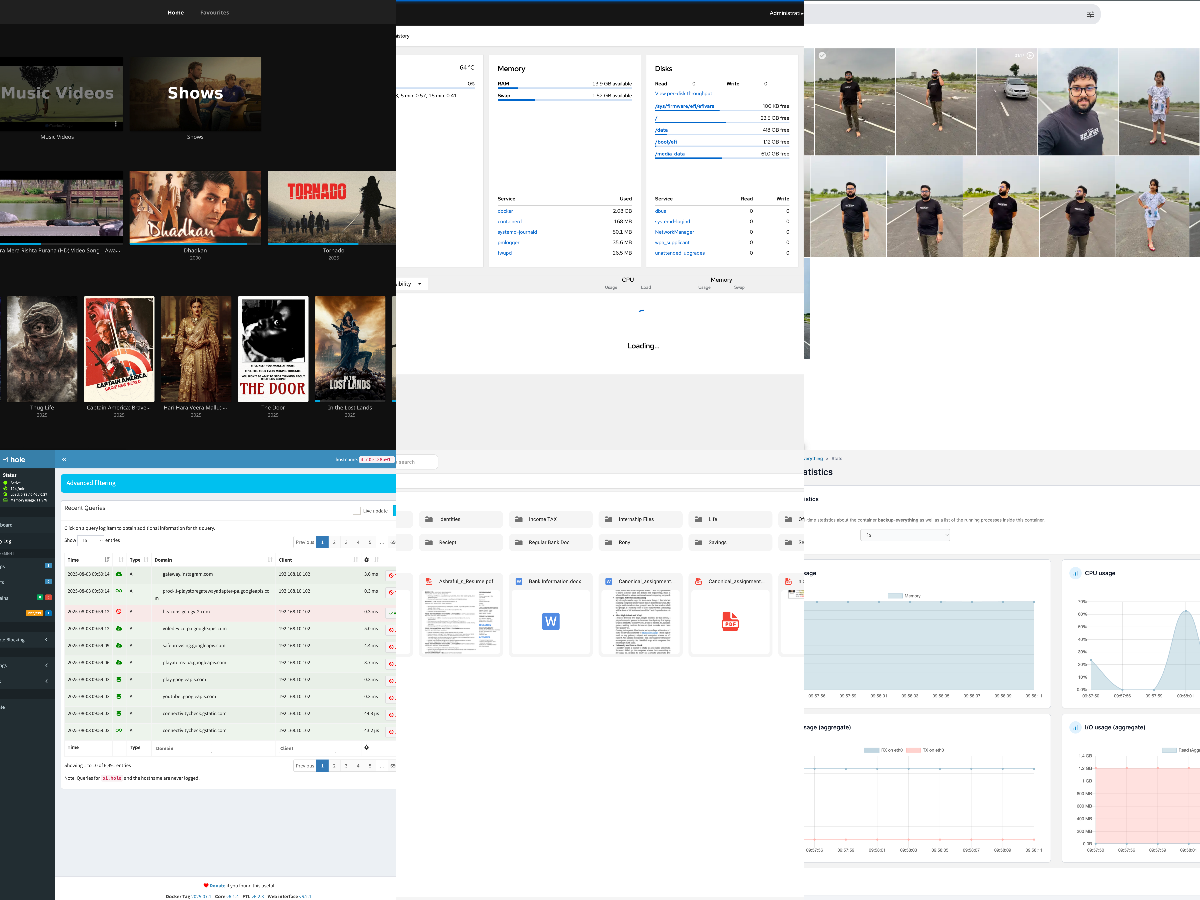
# 1. Immich: My Photo and Video Sanctuary
Immich is my go-to for backing up and managing photos and videos. Think Google Photos, but self-hosted, private, and free.
- Why I Chose It: Immich offers automatic backups, face recognition, and a clean mobile app, all without sending my personal memories to the cloud. It’s perfect for keeping my family’s photos secure.
- How It Works: I installed Immich via Docker, and it syncs photos and videos from my phone automatically over Wi-Fi. It organizes them by date, location, or people (using AI-based tagging), and I can access them from any device via a web interface or app.
- My Experience: Immich has saved me from losing precious memories—like my kid’s first birthday video—while keeping them off Big Tech’s servers. The setup took some tweaking to get the AI features running smoothly, but it’s been worth it.
# 2. Jellyfin: My Personal Netflix
Jellyfin is the crown jewel of my home server, turning it into a media streaming powerhouse. This open-source media server lets me stream my collection of movies, TV shows, music, and even audiobooks to any device—my TV, phone, or laptop—without a subscription.
- Why I Chose It: Unlike Plex, which has a freemium model with paid features, Jellyfin is 100% free and open-source. It gives me full control over my media library, with no cloud dependency.
- How It Works: I store my media files (MP4s, MP3s, etc.) on the server’s hard drive. Jellyfin organizes them with metadata, album art, and subtitles, creating a sleek interface that rivals commercial streaming platforms. I access it via a web browser or Jellyfin’s apps on my devices.
- My Experience: Setting up Jellyfin was a breeze with Docker. I love binge-watching my favorite shows on my Roku, knowing it’s all hosted at home. Plus, I can share my library with family without worrying about data leaks.
# 3. Cloudreve: My Personal Cloud Storage
Cloudreve is my Google Drive alternative, offering a self-hosted cloud storage solution for files, documents, and more.
- Why I Chose It: Cloudreve is lightweight, supports multiple storage backends (like local drives or S3), and has a user-friendly interface. It’s perfect for accessing files from anywhere without relying on third-party cloud providers.
- How It Works: I set up Cloudreve to store files on my server’s hard drive. It provides a web interface and WebDAV support, so I can upload, download, or share files securely. I also use it to back up important documents.
- My Experience: Cloudreve has been a game-changer for sharing large files with friends or accessing work documents remotely. The setup was straightforward, though I had to configure SSL for secure access.
# 4. Pi-Hole: The Ad-Blocking Network Guardian
Pi-Hole is my network-wide ad and tracker blocker, making my internet experience faster and cleaner.
- Why I Chose It: Pi-Hole blocks ads at the DNS level, meaning no pop-ups or video ads on any device connected to my network. It’s also a great way to monitor network activity.
- How It Works: Running in a Docker container, Pi-Hole acts as my network’s DNS server. It filters out requests to known ad and tracker domains, replacing them with nothing. I pointed my router’s DNS settings to Pi-Hole, and it works seamlessly.
- My Experience: The difference is night and day—web pages load faster, and YouTube is ad-free on my smart TV. The dashboard showing blocked domains is oddly satisfying to check.
# 5. Portainer: Keeping My Containers in Check
Portainer is my go-to tool for managing Docker containers, making it easy to monitor and control all the services on my server.
- Why I Chose It: Portainer’s web-based interface simplifies Docker management, especially for someone like me who prefers a GUI over command-line tinkering.
- How It Works: Portainer connects to my Docker environment and lets me start, stop, or update containers, check logs, and monitor resource usage. It’s like a control panel for my server’s services.
- My Experience: Portainer has saved me countless hours of debugging. I can see at a glance if Jellyfin or Immich is acting up and restart containers with a click.
# 6. Nginx Proxy Manager: Simplifying Reverse Proxies
Nginx Proxy Manager makes it easy to manage reverse proxies, allowing secure access to my services with custom domains and SSL certificates.
- Why I Chose It: Setting up reverse proxies manually with Nginx configs is a hassle. Nginx Proxy Manager’s graphical interface lets me configure proxies and SSL (via Let’s Encrypt) in minutes.
- How It Works: I use it to route traffic to my services (e.g.,
jellyfin.mydomain.comto Jellyfin’s port). It handles SSL termination, ensuring secure connections. - My Experience: This was a lifesaver for accessing my services remotely without exposing ports to the internet. The setup was intuitive, and I love the clean dashboard.
# 7. Cockpit: Remote Management Made Easy
Cockpit is my tool for remotely managing my Ubuntu server, giving me a web-based interface to monitor and tweak system settings.
- Why I Chose It: Cockpit is lightweight and integrates well with Ubuntu, offering a one-stop shop for system stats, updates, and user management.
- How It Works: Running in a Docker container, Cockpit provides a dashboard to check CPU, memory, disk usage, and logs. I can also manage services or reboot the server remotely.
- My Experience: Cockpit is my safety net when I’m away from home. I once fixed a stuck service while on vacation, all from my phone’s browser.
# 8. My Custom Note and Expense Tracking System: A Personal Touch
The final piece of my home server puzzle is a note and expense tracking system I built myself, tailored to my needs.
- Why I Built It: I wanted a simple, private way to track daily notes and expenses without relying on apps like Notion or Mint, which store data in the cloud.
- How It Works: Written in [insert language, e.g., Python with Flask or Node.js], it’s a web app running in a Docker container. It has a minimalist interface for adding notes (with tags and search) and logging expenses (with categories and monthly summaries). Data is stored in a local SQLite database.
- My Experience: Building this was a labor of love. It’s not perfect, but it’s mine. I use it daily to jot down ideas or track spending, and it’s satisfying to know it’s fully under my control.
# The Bigger Picture: Why This Matters
Running these services on my home server has been transformative. Jellyfin and Immich keep my media and memories safe and accessible. Cloudreve and my custom app handle my files and personal data without third-party snooping. Pi-Hole, Portainer, Nginx Proxy Manager, and Cockpit keep everything running smoothly and securely. Together, they’ve saved me money, boosted my privacy, and taught me valuable skills.
But beyond the tech, this setup is about empowerment. It’s about saying “no” to walled gardens and “yes” to owning your digital life. My server isn’t just a machine—it’s a statement that I can build, manage, and control my own corner of the internet.
# Getting Started with Your Own Home Server
Inspired to start your own home server? Here’s a quick roadmap:
- Hardware: Start small with a Raspberry Pi, an old PC, or a dedicated NAS.
- OS: Use Ubuntu Server or a NAS-focused OS like TrueNAS for ease of use.
- Docker: Learn Docker to simplify service deployment (Portainer makes this easier).
- Services: Pick one or two services (like Jellyfin or Pi-Hole) and expand from there.
- Community: Join communities like r/homelab or r/selfhosted on Reddit, or follow home server discussions on X for tips and inspiration.
# Conclusion: The Heart of My Digital Home
My home server is more than a collection of services; it’s a reflection of my desire for independence, creativity, and control. From streaming movies with Jellyfin to tracking expenses with my custom app, every service tells a story of problem-solving and discovery. If you’re curious about home servers, I encourage you to dive in. Start small, experiment, and join the growing community of self-hosters. What’s your home server story? Let me know in the comments or on X!